Your webhook endpoint must be publicly accessible.
Setup
import { KadoaClient } from "@kadoa/node-sdk";

const client = new KadoaClient({ apiKey: "your-api-key" });

await client.notification.setupForWorkflow({
  workflowId: "your-workflow-id",
  events: ["workflow_data_change"],
  channels: {
    WEBHOOK: {
      name: "my-webhook",
      webhookUrl: "https://api.example.com/webhooks/kadoa",
      httpMethod: "POST",
    },
  },
});
Dashboard Setup
- Go to Notifications in the sidebar
- Click Add Channel → Webhook
- Enter your endpoint URL
- Save changes
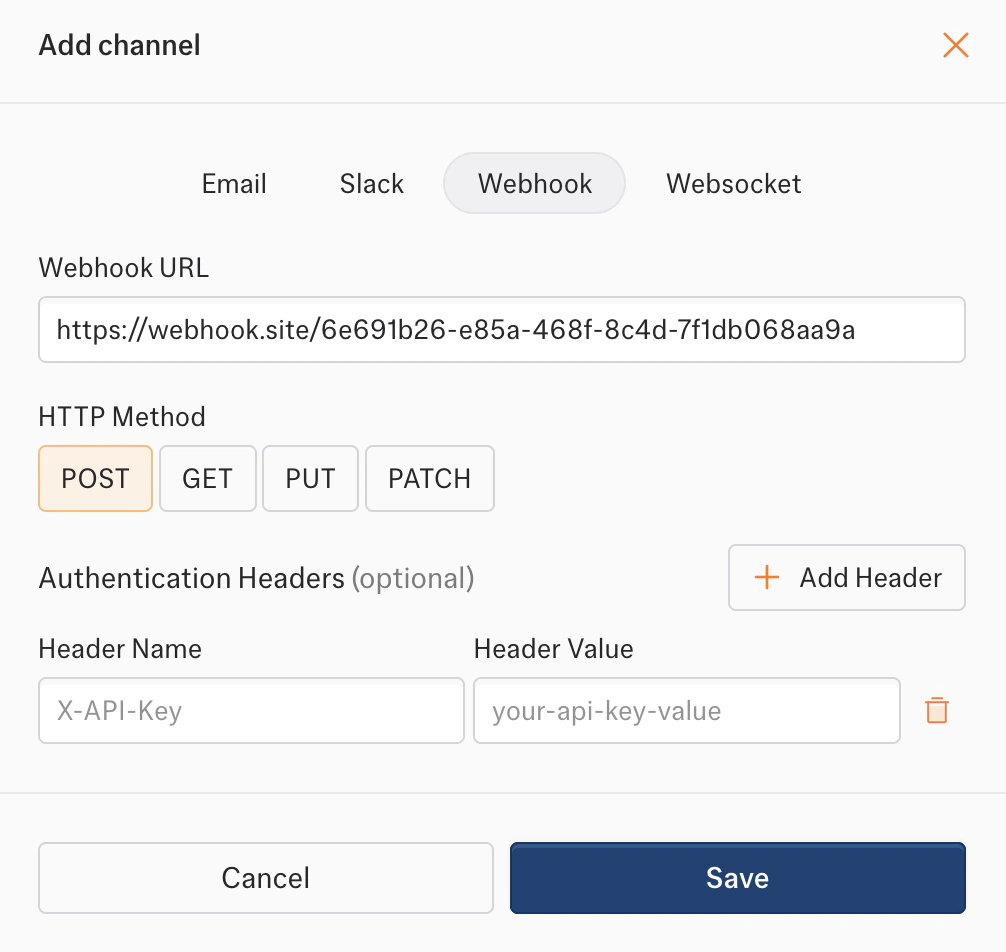
Authentication
Add custom headers for webhook authentication:
// POST /v5/notifications/channels
{
  "channelType": "WEBHOOK",
  "name": "Authenticated Webhook",
  "config": {
    "webhookUrl": "https://api.example.com/webhooks/kadoa",
    "httpMethod": "POST",
    "auth": {
      "type": "HEADER",
      "headers": {
        "Authorization": "Bearer your-secret-token",
        "X-Custom-Header": "custom-value"
      }
    }
  }
}
| Header | Description |
|---|
Content-Type | application/json |
X-Kadoa-Event | Event type (e.g., workflow_data_change) |
Payload Reference
All payloads follow this structure:
{
  "eventType": "event_name",
  "timestamp": "2025-01-15T10:30:00Z",
  "data": { /* event-specific data */ }
}
{
  "eventType": "workflow_data_change",
  "timestamp": "2025-01-15T10:30:00Z",
  "data": {
    "id": "change_123",
    "workflowId": "wf_123",
    "data": [
      { "id": "record-1", "name": "Product A", "price": 29.99 }
    ],
    "differences": [
      {
        "type": "changed",
        "fields": [
          { "key": "price", "value": 29.99, "previousValue": 24.99 }
        ]
      },
      {
        "type": "added",
        "fields": [
          { "key": "id", "value": "record-2" },
          { "key": "name", "value": "New Product" }
        ]
      }
    ],
    "url": "https://monitored-page.com",
    "createdAt": "2025-01-15T10:30:00Z",
    "metadata": {
      "workflowName": "Product Monitor",
      "tags": ["pricing"]
    }
  }
}
| Event | Description |
|---|
workflow_data_change | Monitored data changes. Difference types: changed, added, removed |
workflow_finished | Workflow completes successfully |
workflow_failed | Workflow fails. Actions: retry, pause, notify |
workflow_validation_anomaly_change | Validation anomalies change |
Error Handling
Kadoa retries failed webhook deliveries with exponential backoff:
| Attempt | Delay |
|---|
| 1st retry | 1 second |
| 2nd retry | 2 seconds |
| 3rd retry | 4 seconds |
2xx status code to acknowledge receipt.