Create a Template
- Go to Templates and click Create template
- Enter a name for your template
- Configure the parts you want to include:
- Prompt: Enter extraction instructions
- Schema: Define fields and entity name using the schema editor
- Data quality: Define per-field validation rules
- Notifications: Add event subscriptions and choose notification channels
- Frequency: Set how often linked workflows run
- Click Save changes to publish the first version
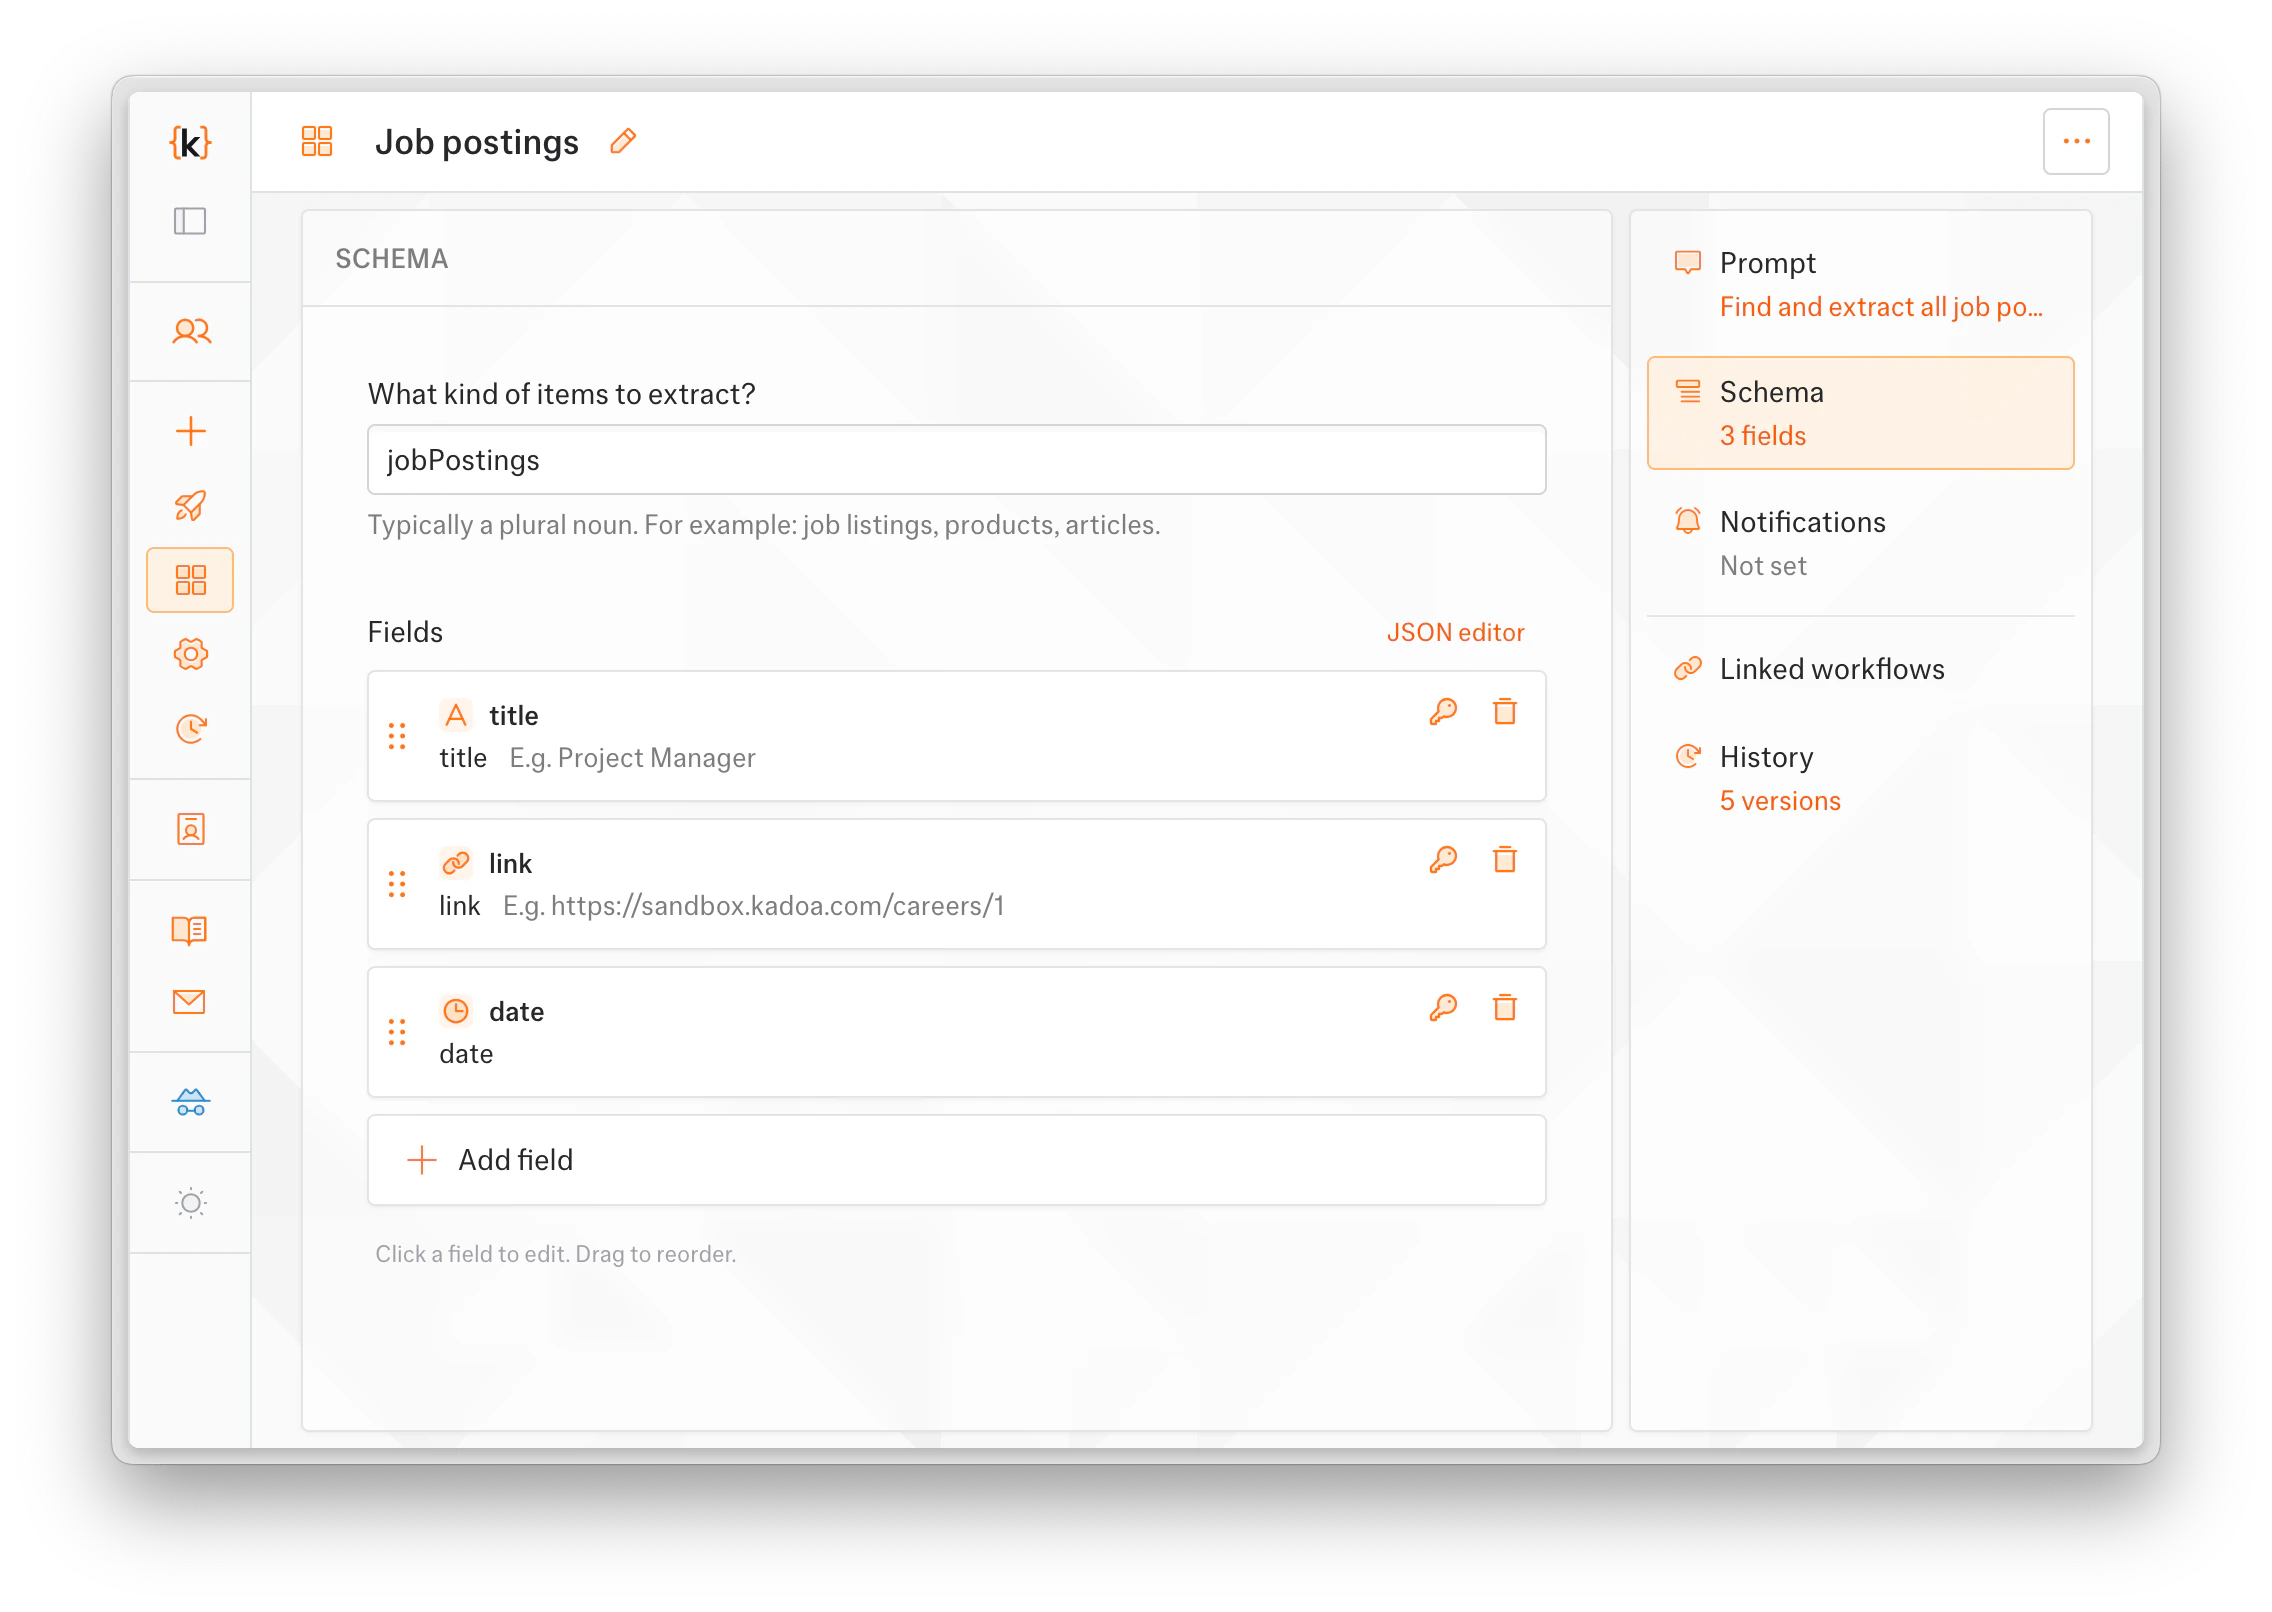
You don’t need to fill in all parts. A template can include any combination of prompt, schema, data quality, notifications, and frequency.
Save a Workflow as a Template
You can create a template from an existing workflow’s configuration:- Open the workflow you want to use as a starting point
- Click the actions menu and select Save as template
- Choose which parts to include (prompt, schema, notifications)
- Enter a name and click Save
Edit a Template
- Go to Templates and click on a template
- Make your changes in the Prompt, Schema, or Notifications tabs
- Click Save changes
Apply Template Changes to Linked Workflows
When you publish a new version, linked workflows don’t update automatically; you decide when to roll it out.- Open the template and switch to the Linked workflows tab to see everything connected
- Click Link workflows to pick existing workflows to link, or use the version controls on a linked workflow to roll out a new version
- Review the affected workflows in the confirmation dialog and confirm
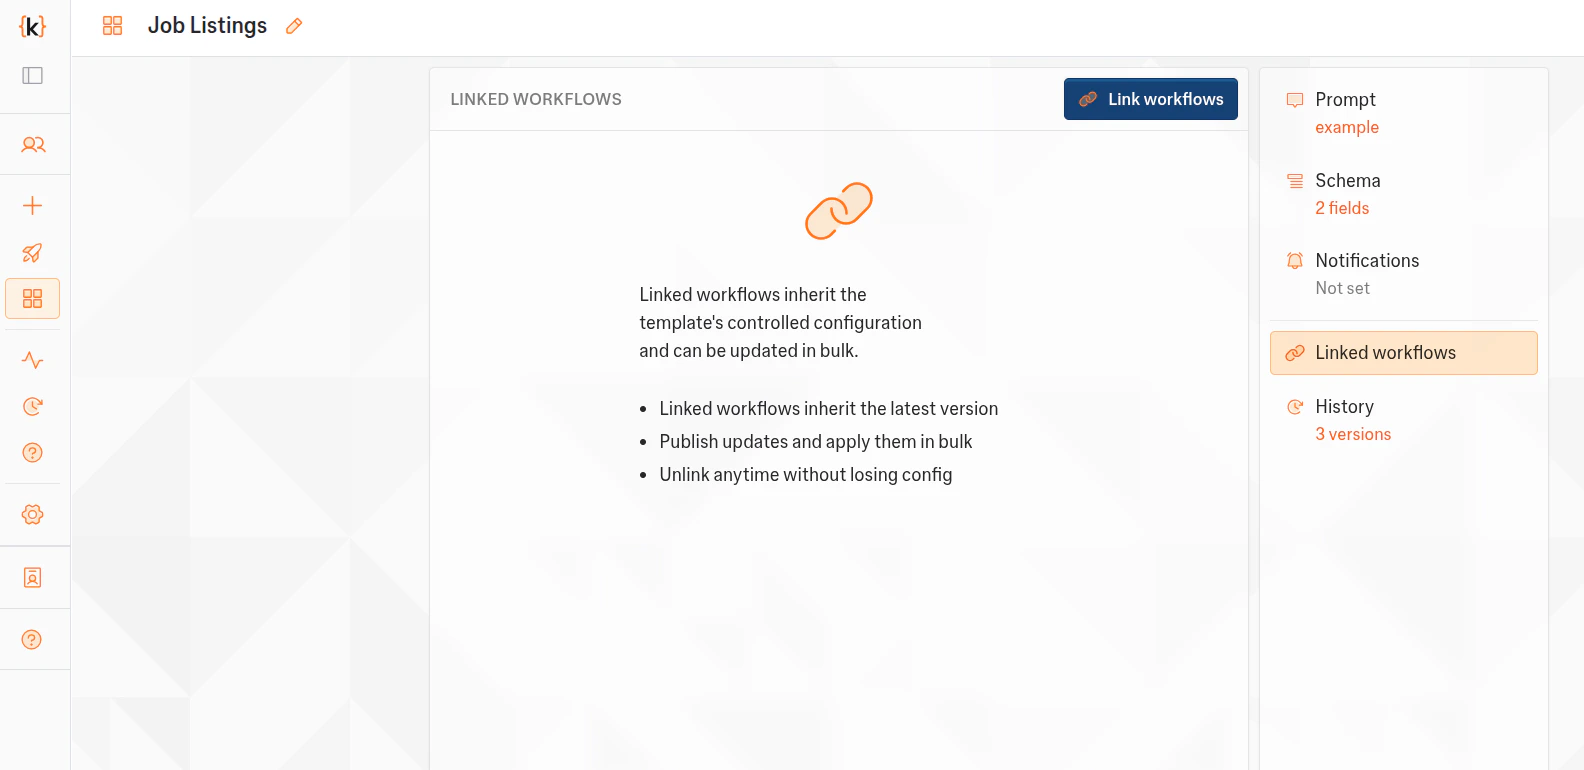
- Active real-time monitors are skipped. Pause them first if you want them in the batch.
- The parts managed by the template stay read-only on each linked workflow. To change them, edit the template and apply, or unlink the workflow first.
Delete a Template
- Go to Templates
- Select the template(s) you want to delete
- Click Delete
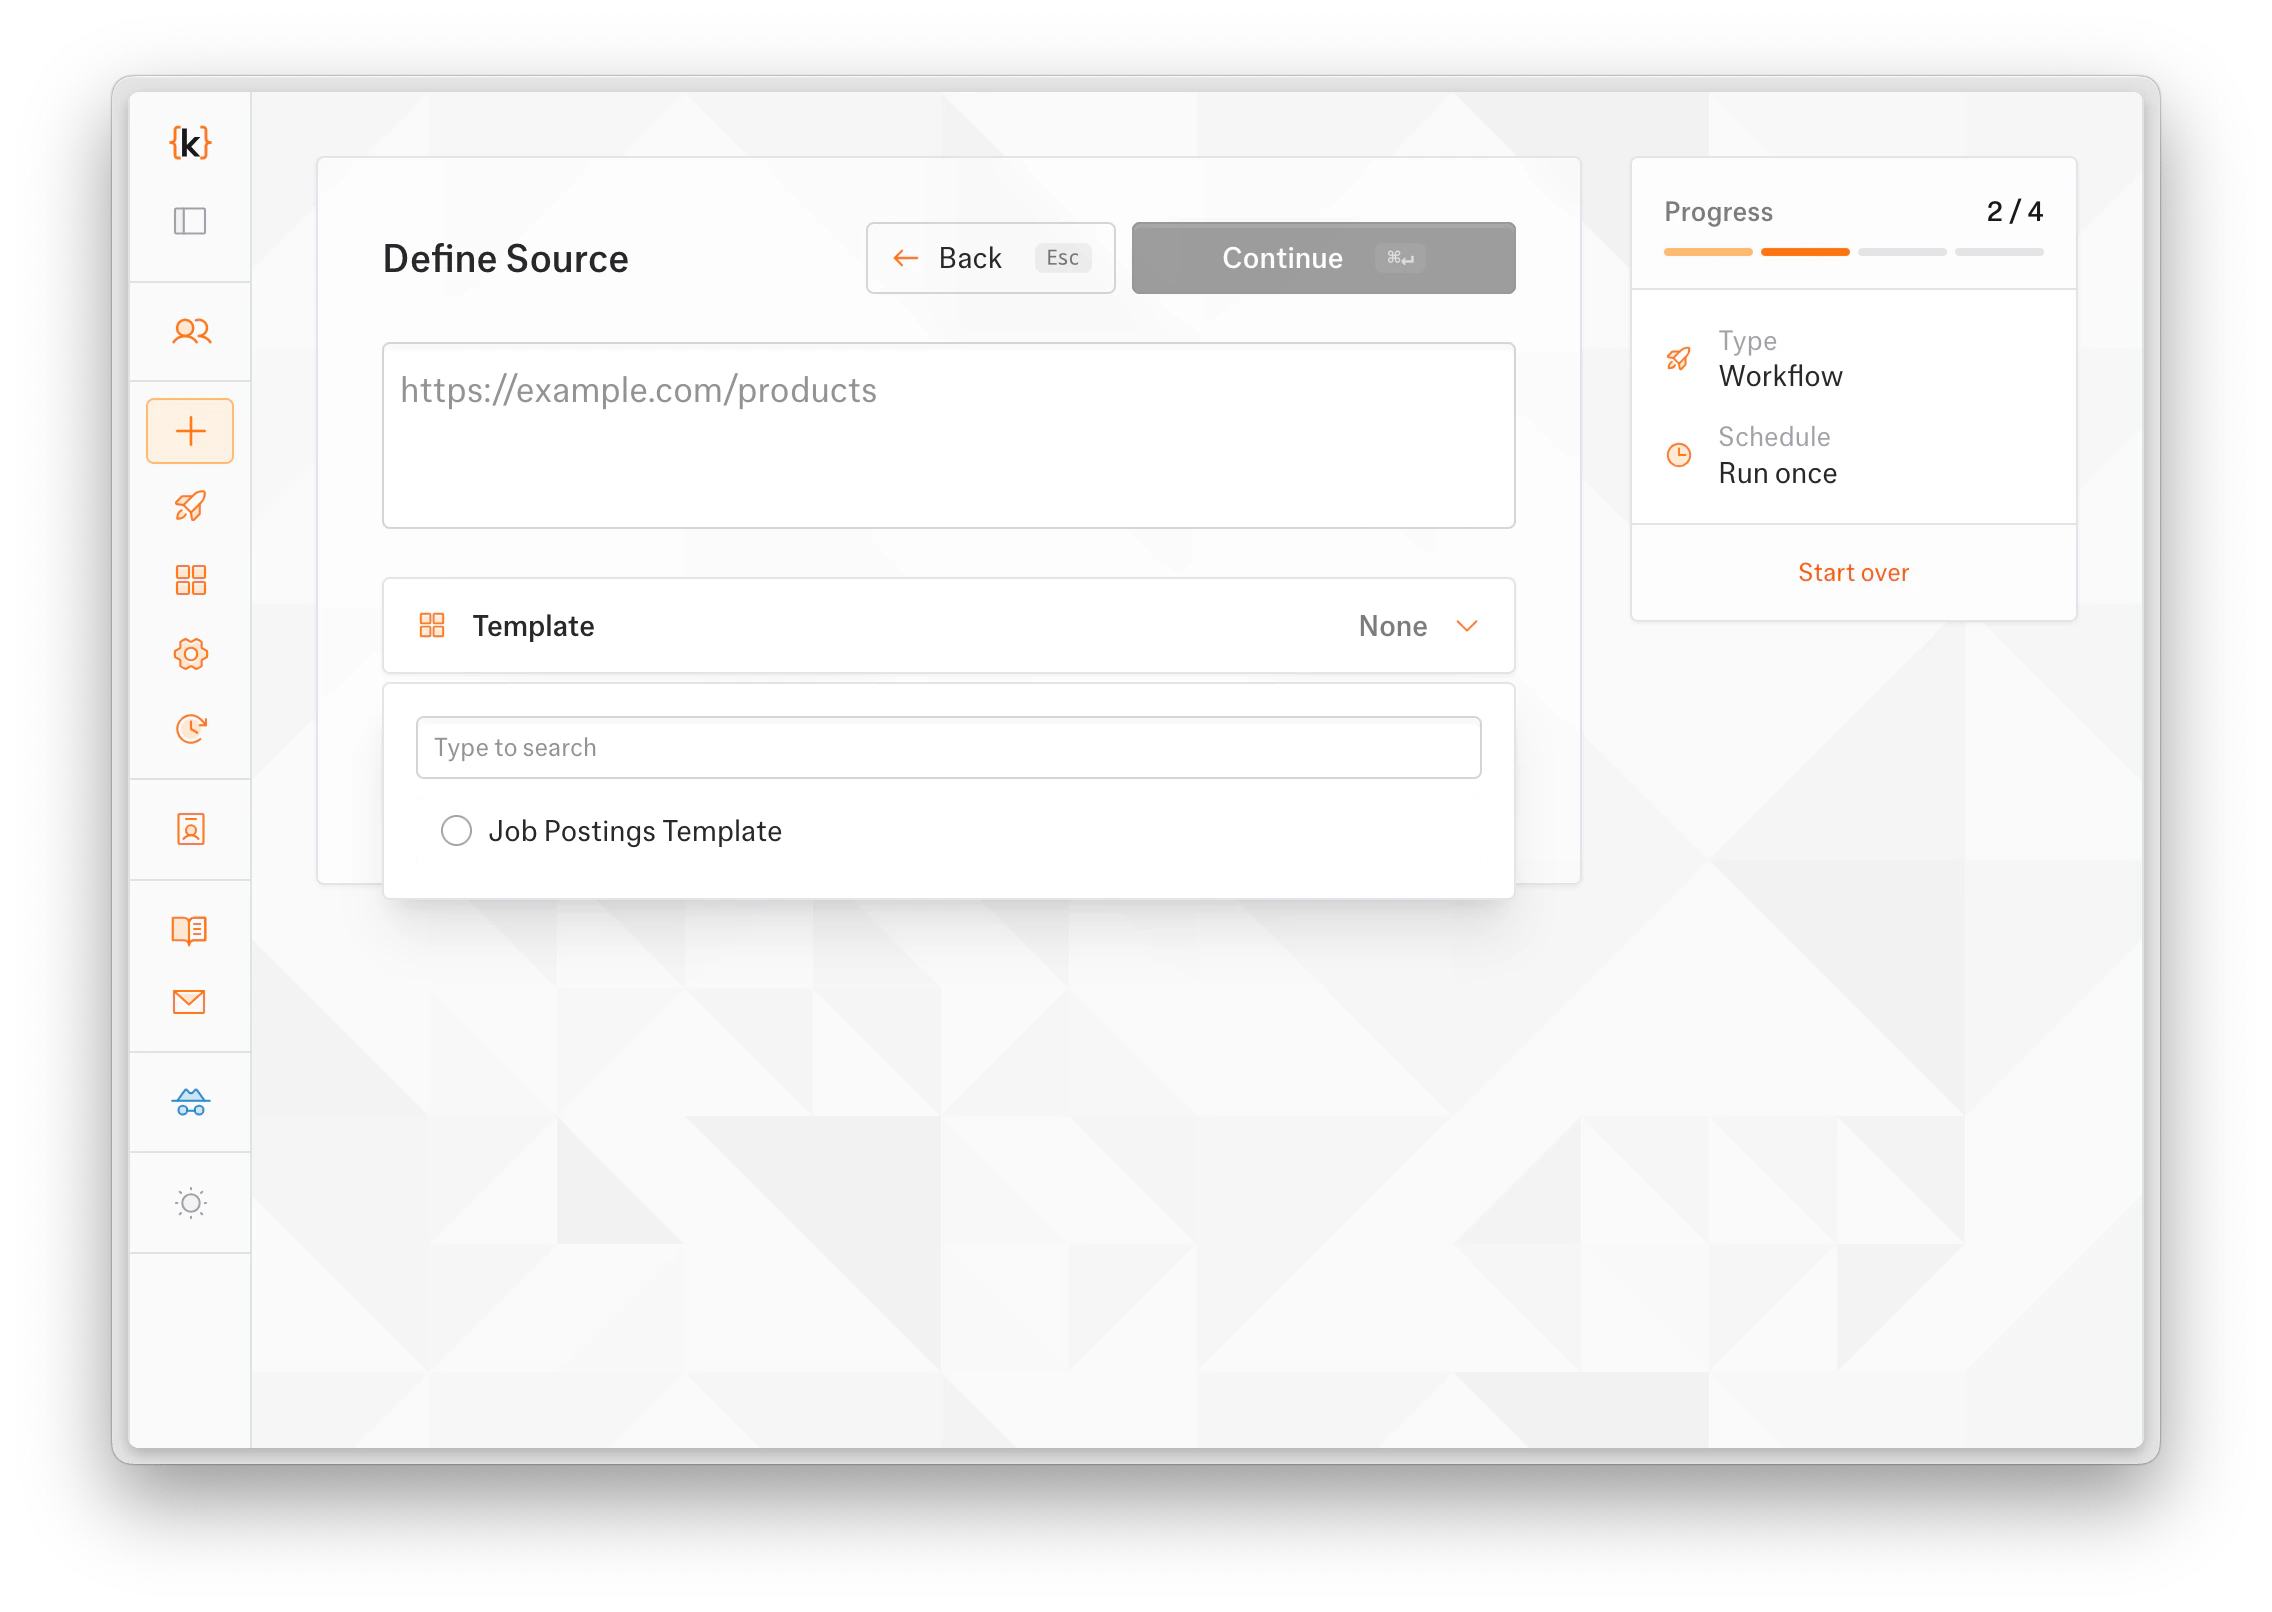
Use a template when creating a workflow
When creating a new workflow, select a template from the setup prompt to pre-fill its available configuration:- Open Create workflow
- Open the Template selector and choose a template
- Review the attached prompt, schema, data quality, notification, and frequency settings
- Complete the prompt and create the workflow