

- Job postings from 50 career pages
- Provider directories from 200 hospital websites
- Public notices from every state portal
Decide what the template owns
Each part of a template is optional. Anything the template owns is read-only on every linked workflow, so include a part only when it should be identical everywhere.Write the setup prompt
The setup prompt is the starting instruction for every workflow created from the template. The agent reads it once, when the workflow is built. Later prompt changes affect new workflows, not workflows that already exist.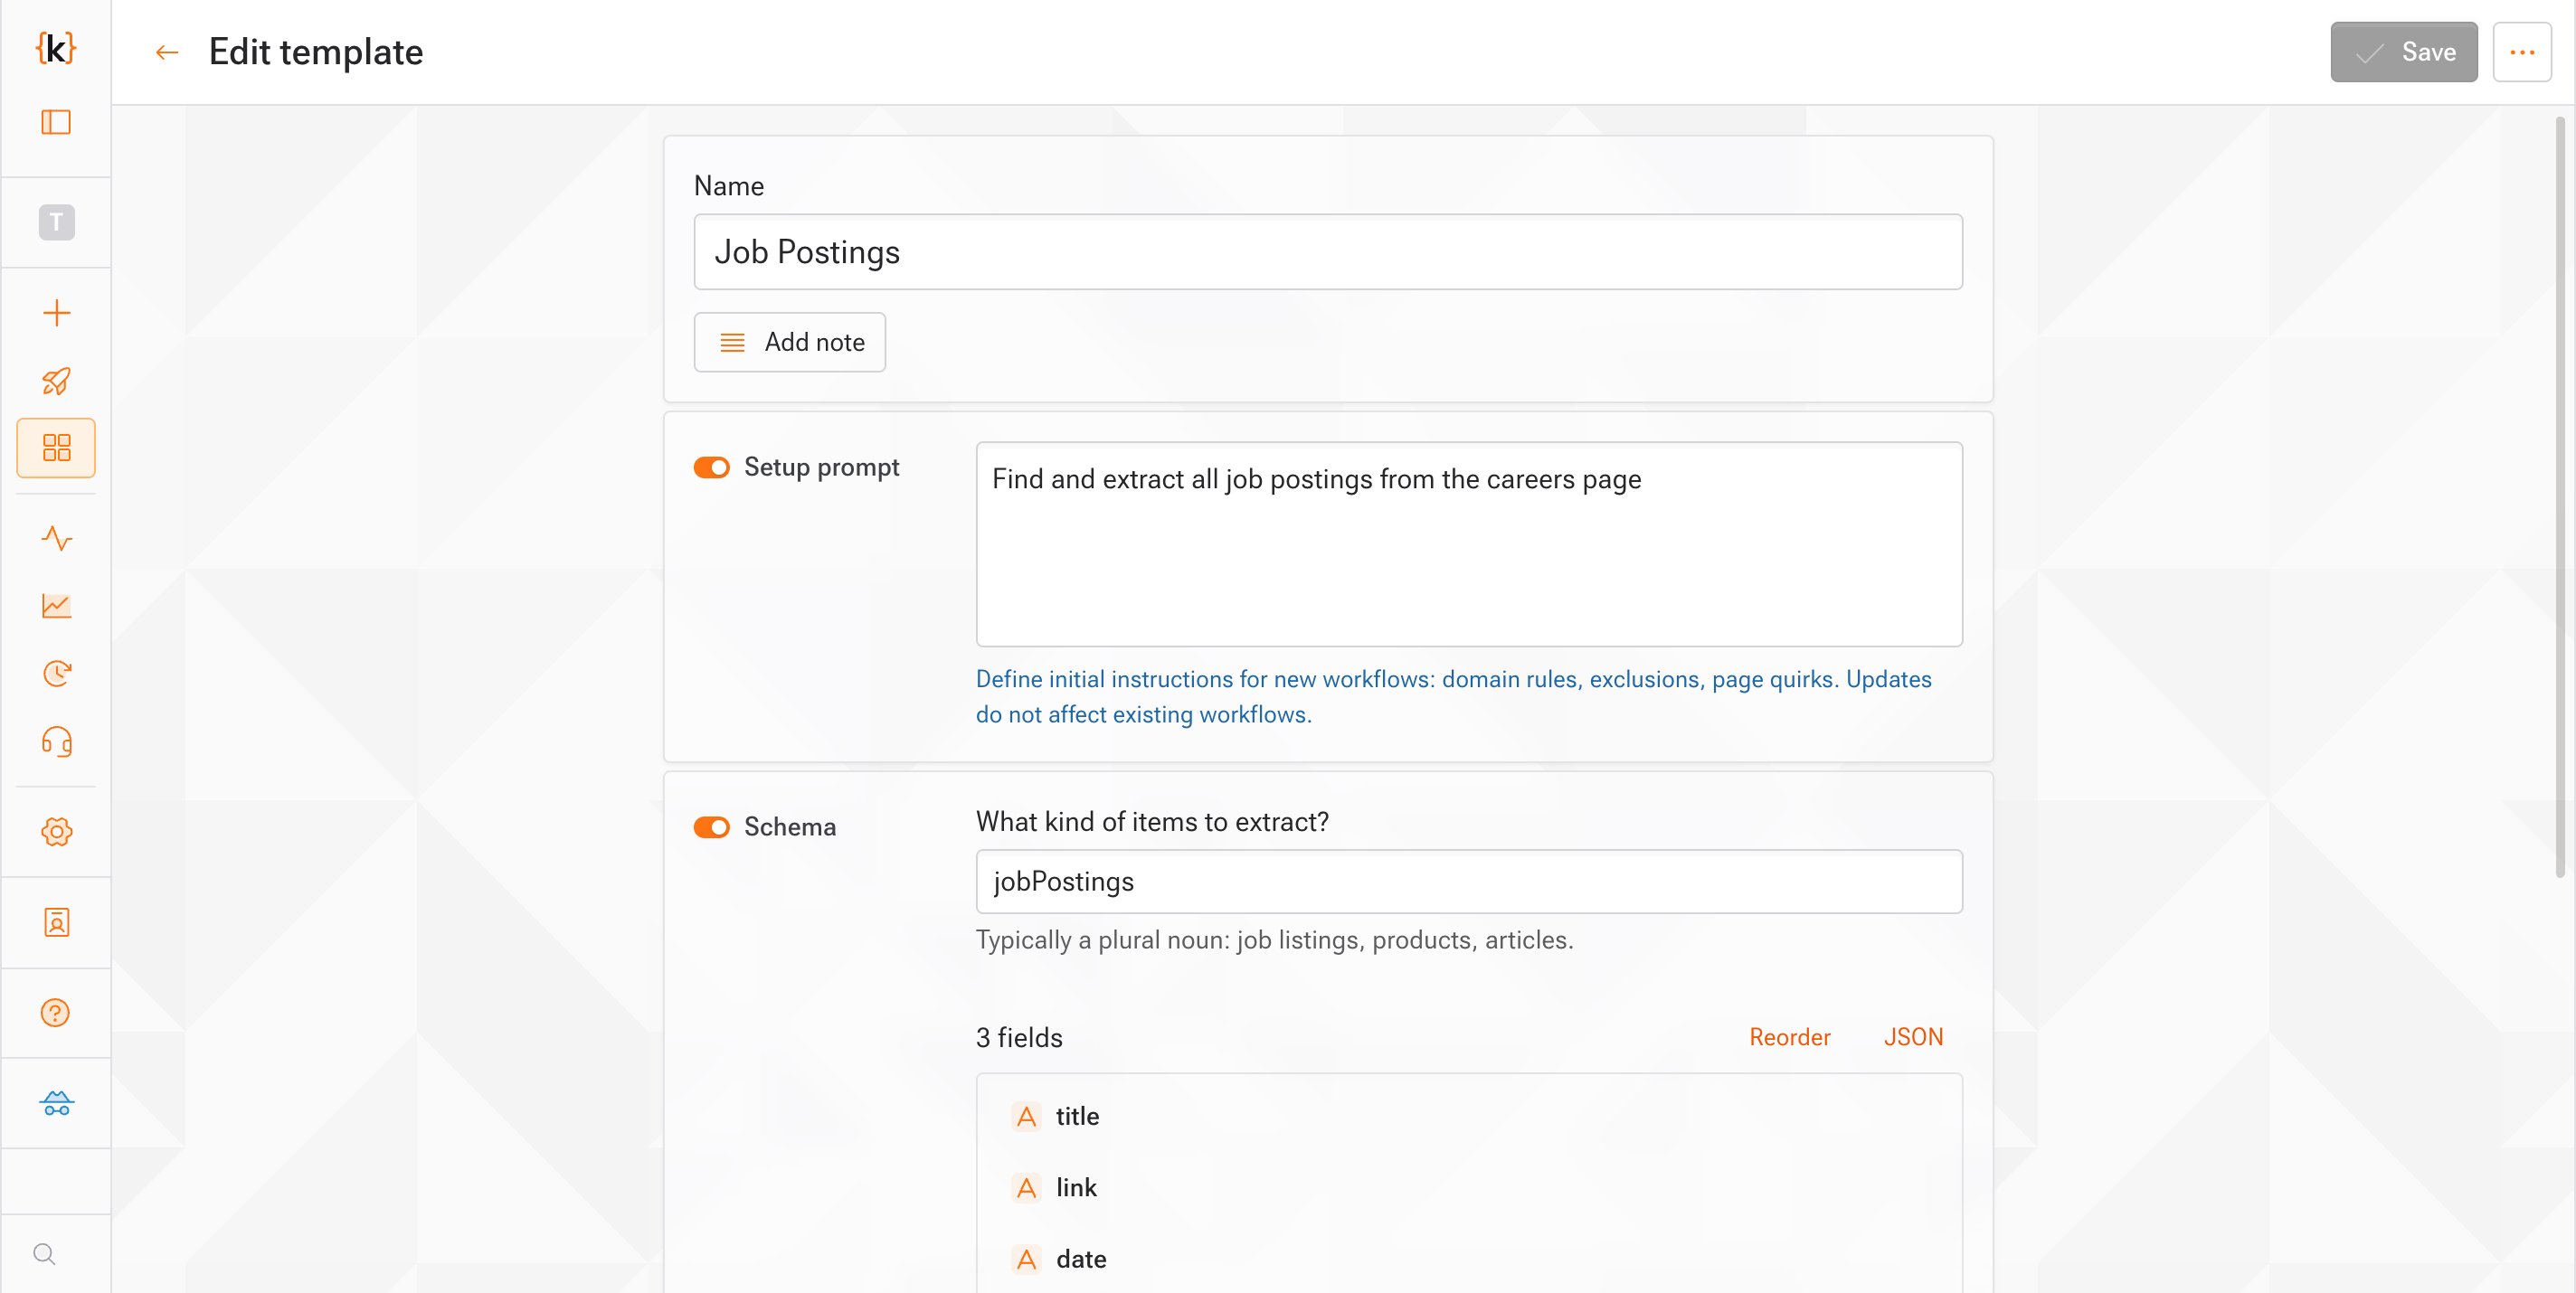
- What a record is. “Each row is one public notice.” “Each row is one provider. A provider listed at several locations is one row per location.”
- Scope. “Stay on the configured site. Do not follow links to other agencies.”
- How the pages tend to work. An overview, not a click path. “Listings usually show a summary; open the detail page for the full text.” “Notices are often attached as PDFs.”
- Pagination and depth. “Continue through all pages. Do not sample or cap the number of records.”
- Empty results. “If no records exist, return no rows rather than approximate ones.”
- Source URLs and site-specific navigation. Add these as extra context when you create each workflow. They stay with that workflow and survive template updates.
- Field names and formats. Those belong in the schema, where each field has its own description and instruction.
- Lists that change over time. Store keyword lists as a variable and reference it with
$in the prompt. You can then update the list without touching the template or any workflow.
Filtering at the source, such as “only postings from the last 7 days” or “exclude closed bids”, has a cost. Kadoa’s completeness check compares the rows extracted with the rows the page shows, so a filtered extraction looks incomplete. Where you can, extract everything the source publishes and filter afterwards. If you need filtering or transformation inside the workflow, contact support so it is set up in a way that keeps the completeness signal correct.
Design the schema
The schema is the part most linked workflows depend on, and it is locked on every linked workflow. Changes go through a new template version, so it is worth getting right before you create workflows at scale.Name and describe each field
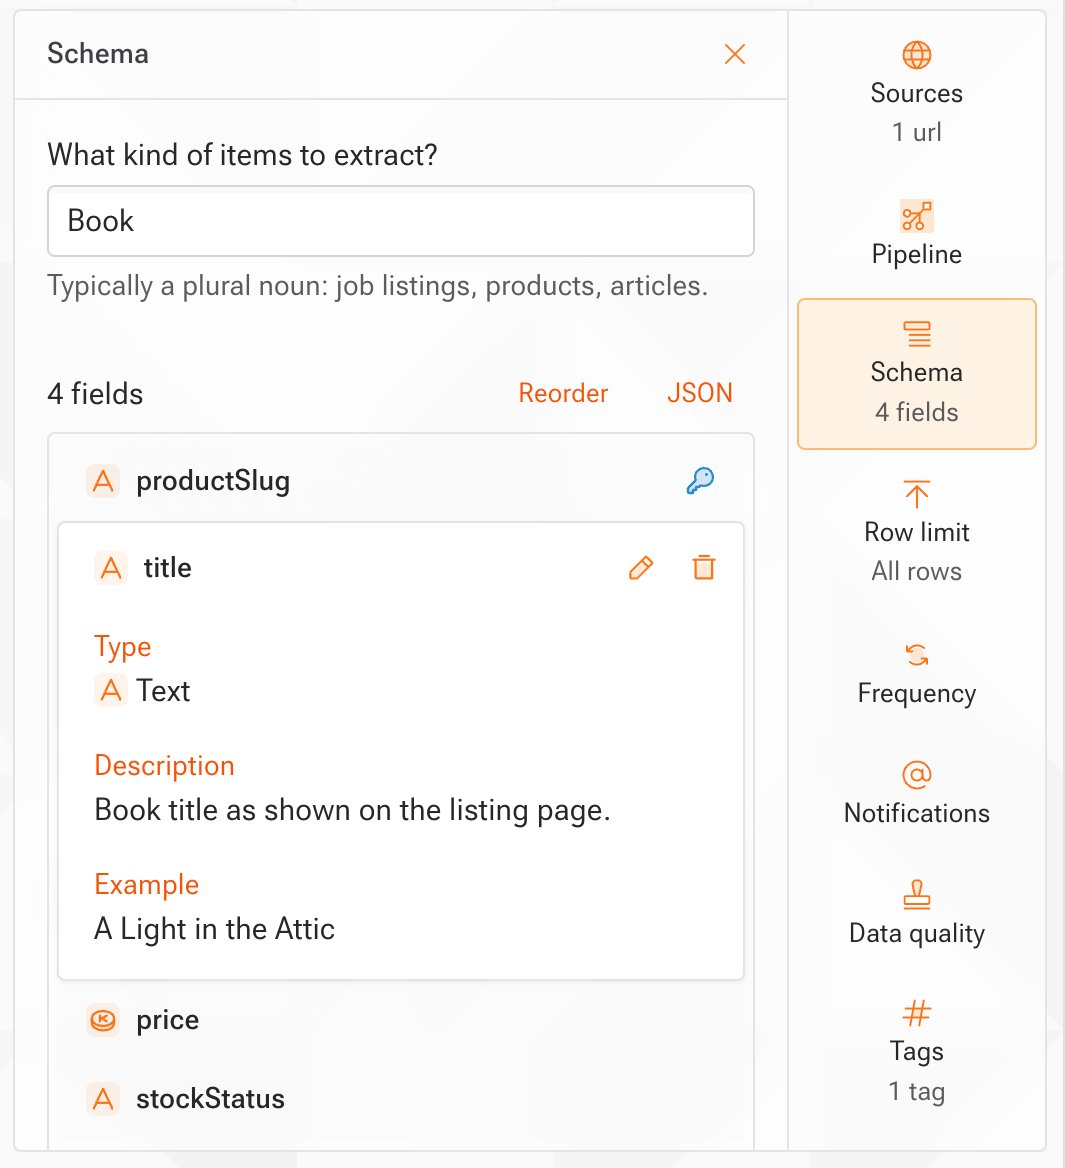
Every field has a name, a description, and an output type. The description tells the agent what the field means. Keep it short and concrete: “Closing date for bids, as published on the notice” is better than “Date”. Two optional settings refine how a value is produced:- Additional instructions for the AI agent apply to this field only. Use them for formatting and sourcing rules. “Use the official title only. Never copy the first sentence of the description.” “Take the value from the detail page, not the listing row.”
- Example shows the format you expect, such as
2026-03-15for a date orSenior Backend Engineerfor a title.
Choose output types that match the data
Pick the narrowest data type that fits.DATE and MONEY are normalized for you, so a date arrives as a date and a price arrives as an amount plus currency. A STRING field that holds a date leaves every downstream consumer to parse it.
For nested data, use OBJECT for a single structured value and ARRAY for a list:
- A bid document with a title and a link is one
OBJECT:{"title": "Addendum 2", "url": "https://..."}. - A list of bidders, each with a name and a contact, is an
ARRAYof objects.
OBJECT and ARRAY fields as JSON in the shape you expect. Kadoa uses that example to define the structure for every workflow created from the template. A populated object must include the properties shown in the example with matching value types. A missing property, or null where the example shows a string, fails the shape check. Only a field left entirely empty passes. Choose a shape that every source can provide.
Give records a stable identity
Key fields tell Kadoa which rows are the same record across runs. That drives deduplication and change detection, so a wrong key produces duplicate rows or missed updates.- Good keys are stable identifiers the source publishes: a posting ID, a canonical URL, a reference number.
- Bad keys are values that change between runs: prices, counts, timestamps, free-text titles.
- If no single published field works as the key on its own, add a Unique ID function field and mark it as the key. Kadoa derives it from a source value on the record: a field you point it at, a key field, or the record’s URL or link. The source still has to differ per record. Two records with the same URL get the same ID, and a record with no source value gets no ID.
Use function fields for computed values
Function fields hold values Kadoa computes rather than extracts: a classification of each record into categories you define, or a generated Unique ID. Define them in the template so every linked workflow computes them the same way.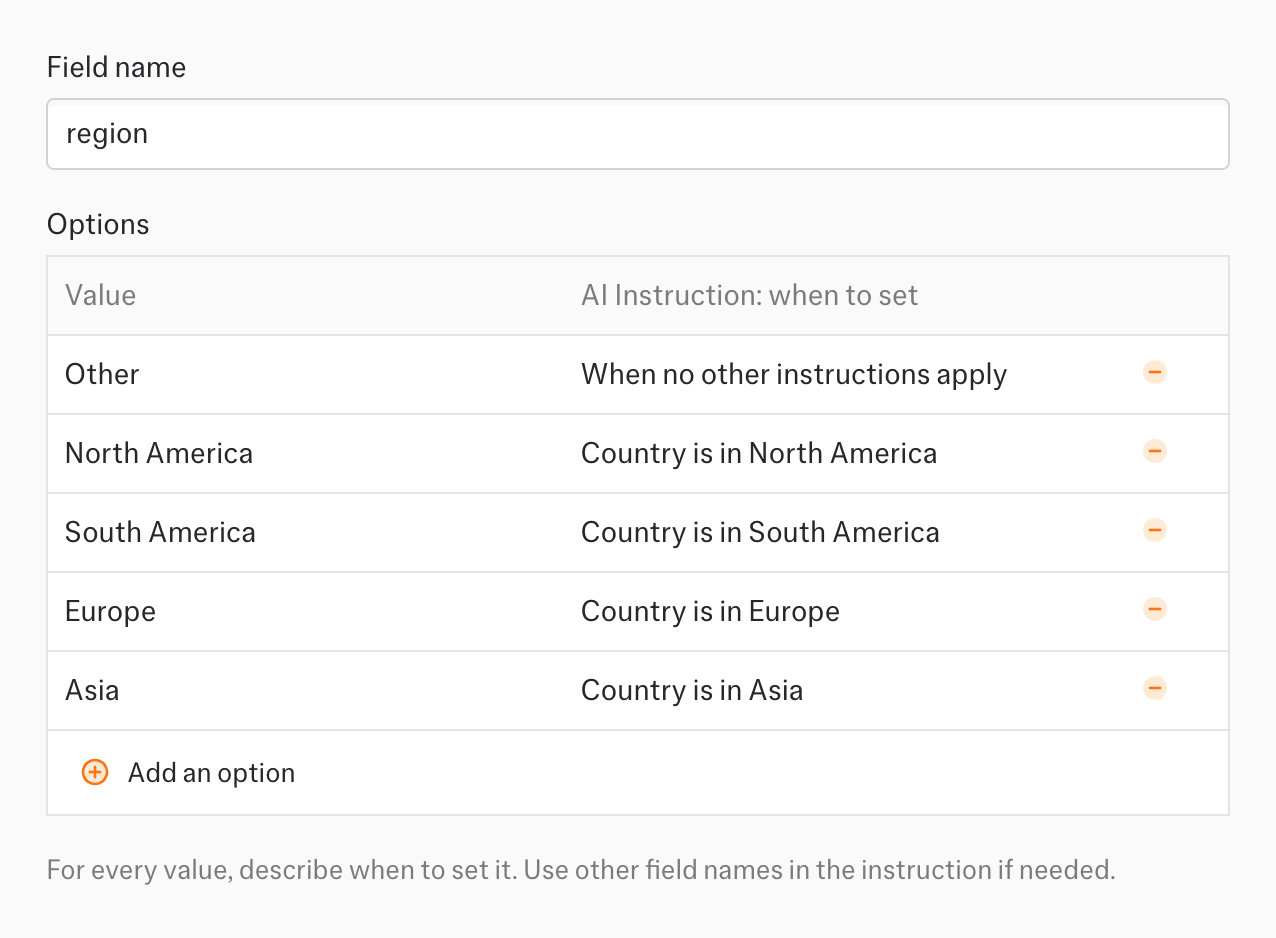
Add data quality rules
Data quality rules are per-field checks that run at the end of every workflow run. In a template they act as fleet-wide guards: one rule protects every linked workflow.Required fields
A field is required when its presence rule has a target of 100 percent.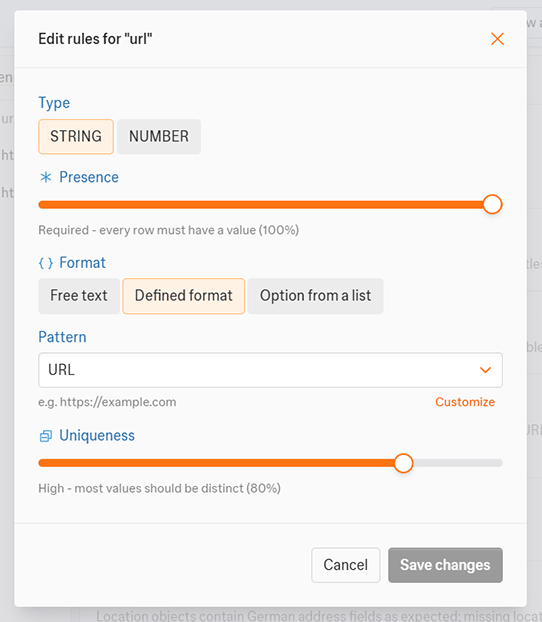
ARRAY field accepts an empty list. Use a minimum item count when the list must contain at least one entry.
What rules do not catch
Rules catch format and completeness problems. They do not tell you whether a value is the right one. A field that passes every rule can still hold the wrong date from the right page. For each new source, review the first full run against the live website, not only the preview, before you treat it as production data.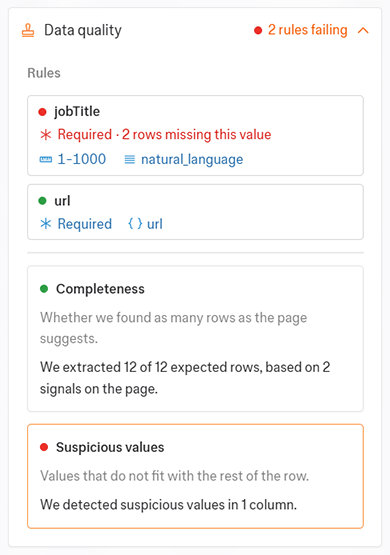
Set notifications, frequency, and record limit
- Notifications apply the same event subscriptions and channels to every linked workflow. Keep them to events the owning team acts on.
- Frequency sets how often linked workflows run. A template frequency uses one timezone for all of its schedules.
- Record limit caps the rows each run keeps. Leave it unset to let each workflow decide.
Create workflows from the template
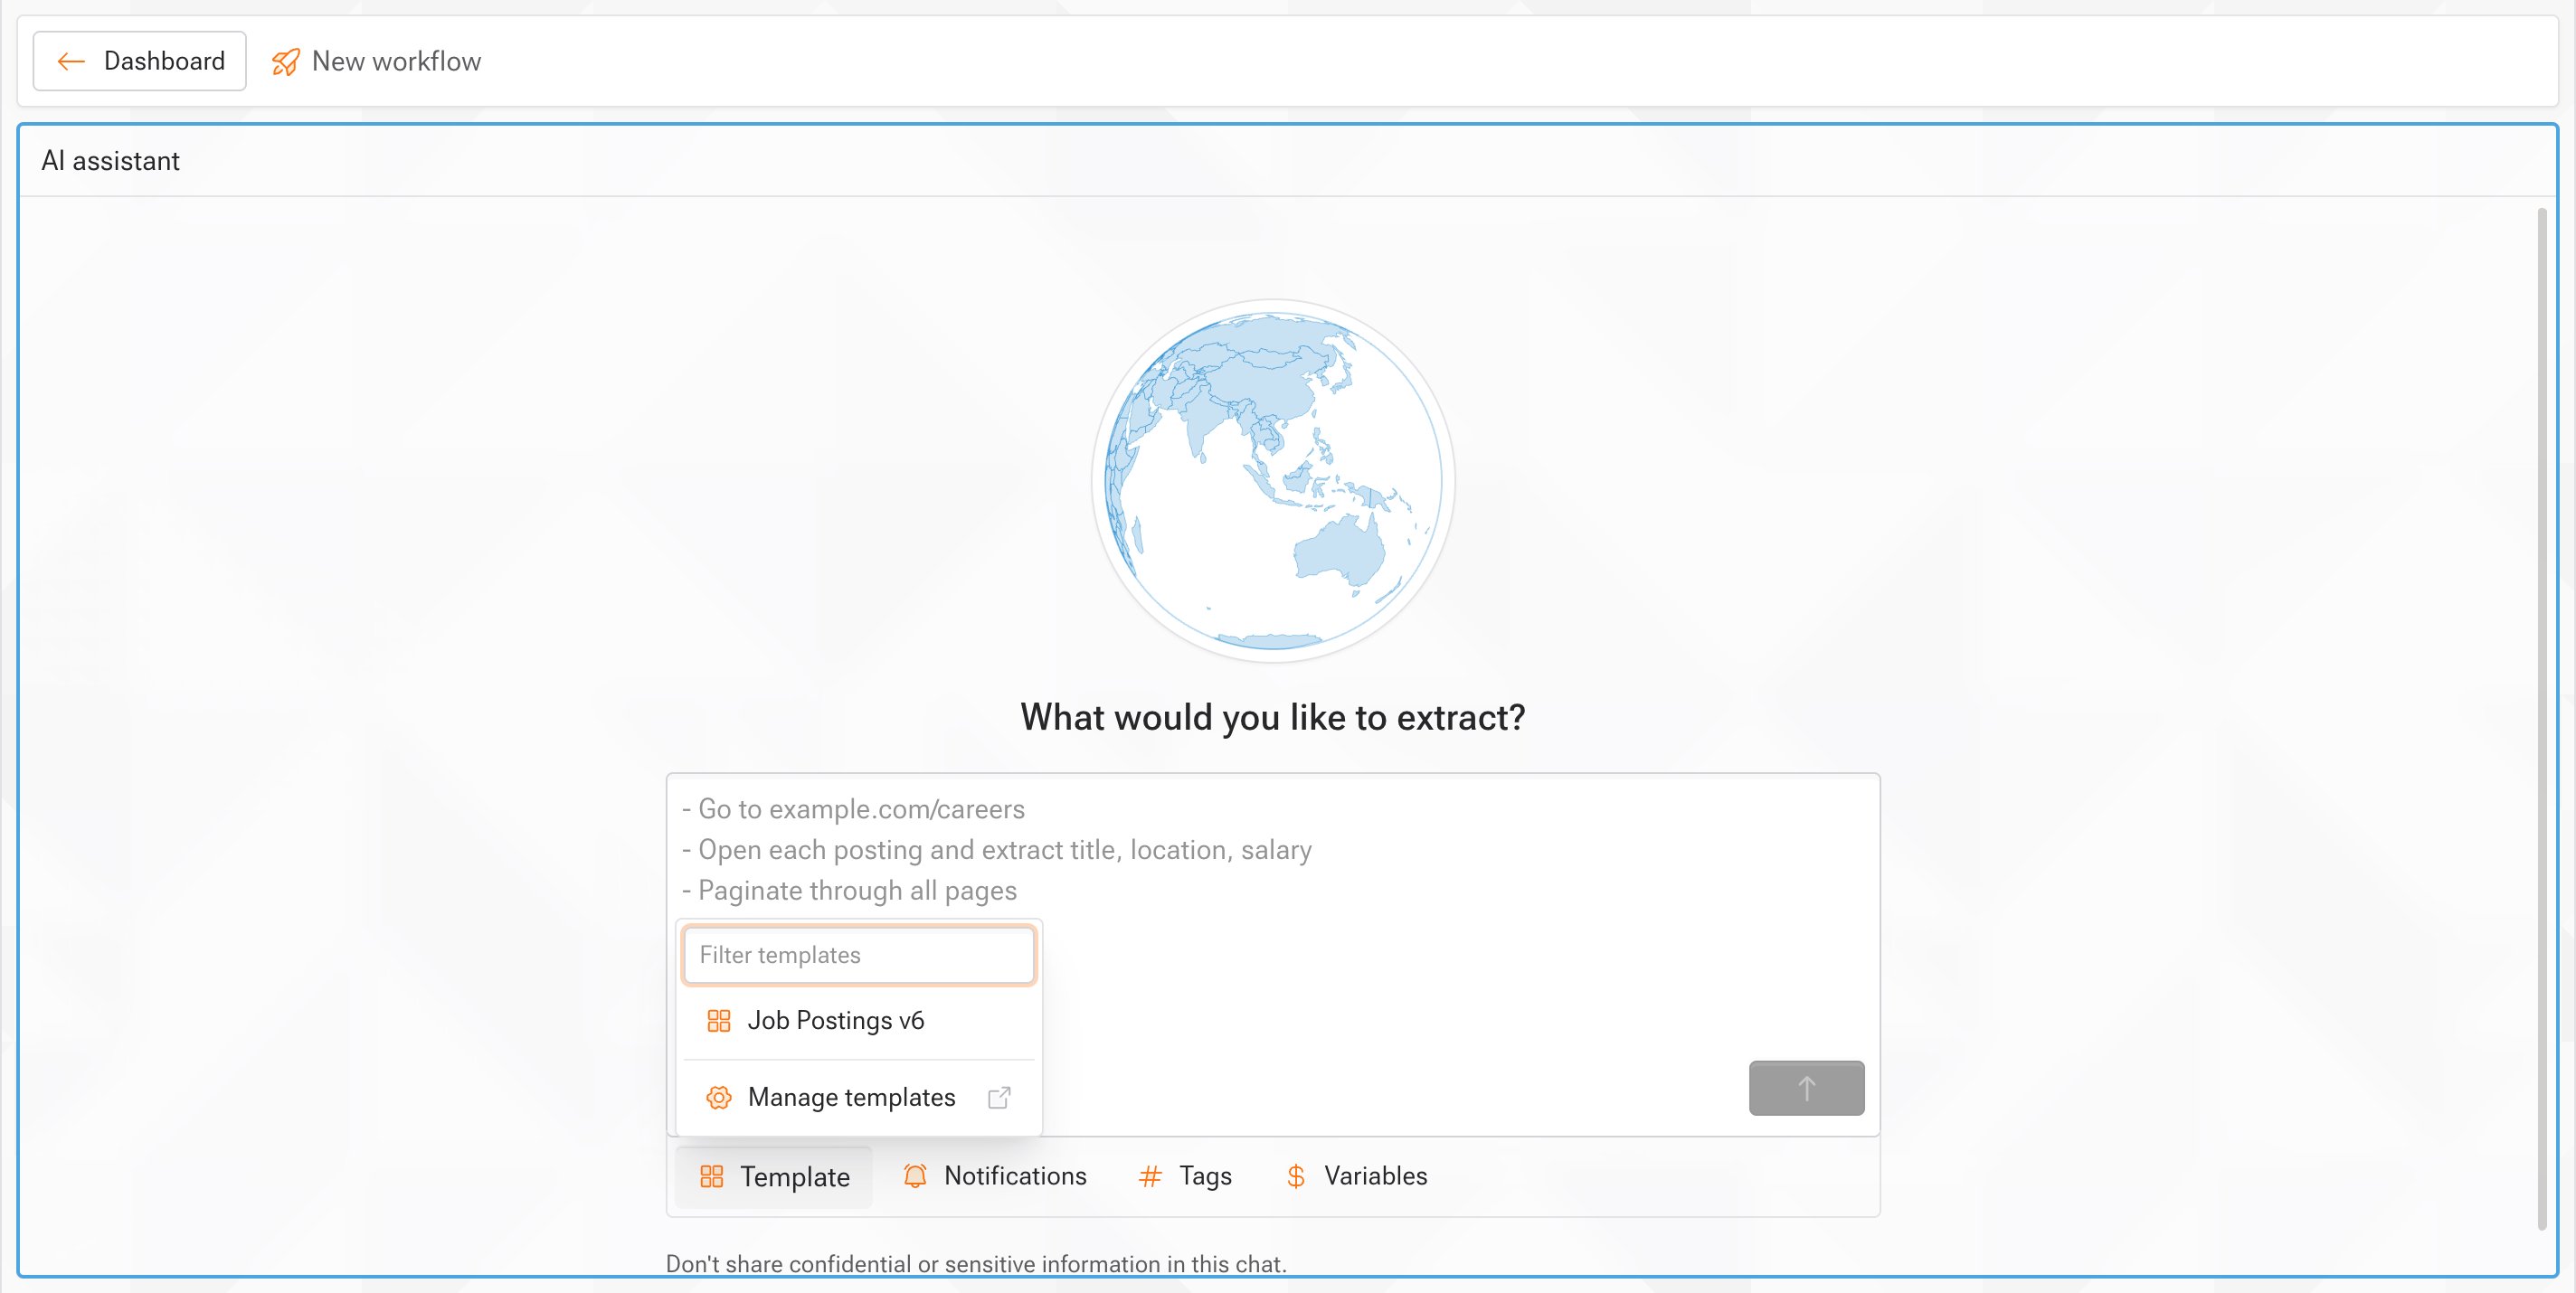
In the dashboard, pick the template in the setup prompt and add the source-specific context. Through the API, sendtemplateId with the URLs and an optional userPrompt for that workflow. Both paths link the workflow to the template’s latest version.
- Does the number of rows match what the site shows?
- Are required fields populated, not just present?
- Did the agent reach the detail pages or documents the schema depends on?
Update a template
Every save publishes a new version. Versions are immutable, and linked workflows stay on their current version until you apply the new one.Before you apply
- Compare with the previous version in the History tab. The diff shows exactly which parts changed.
-
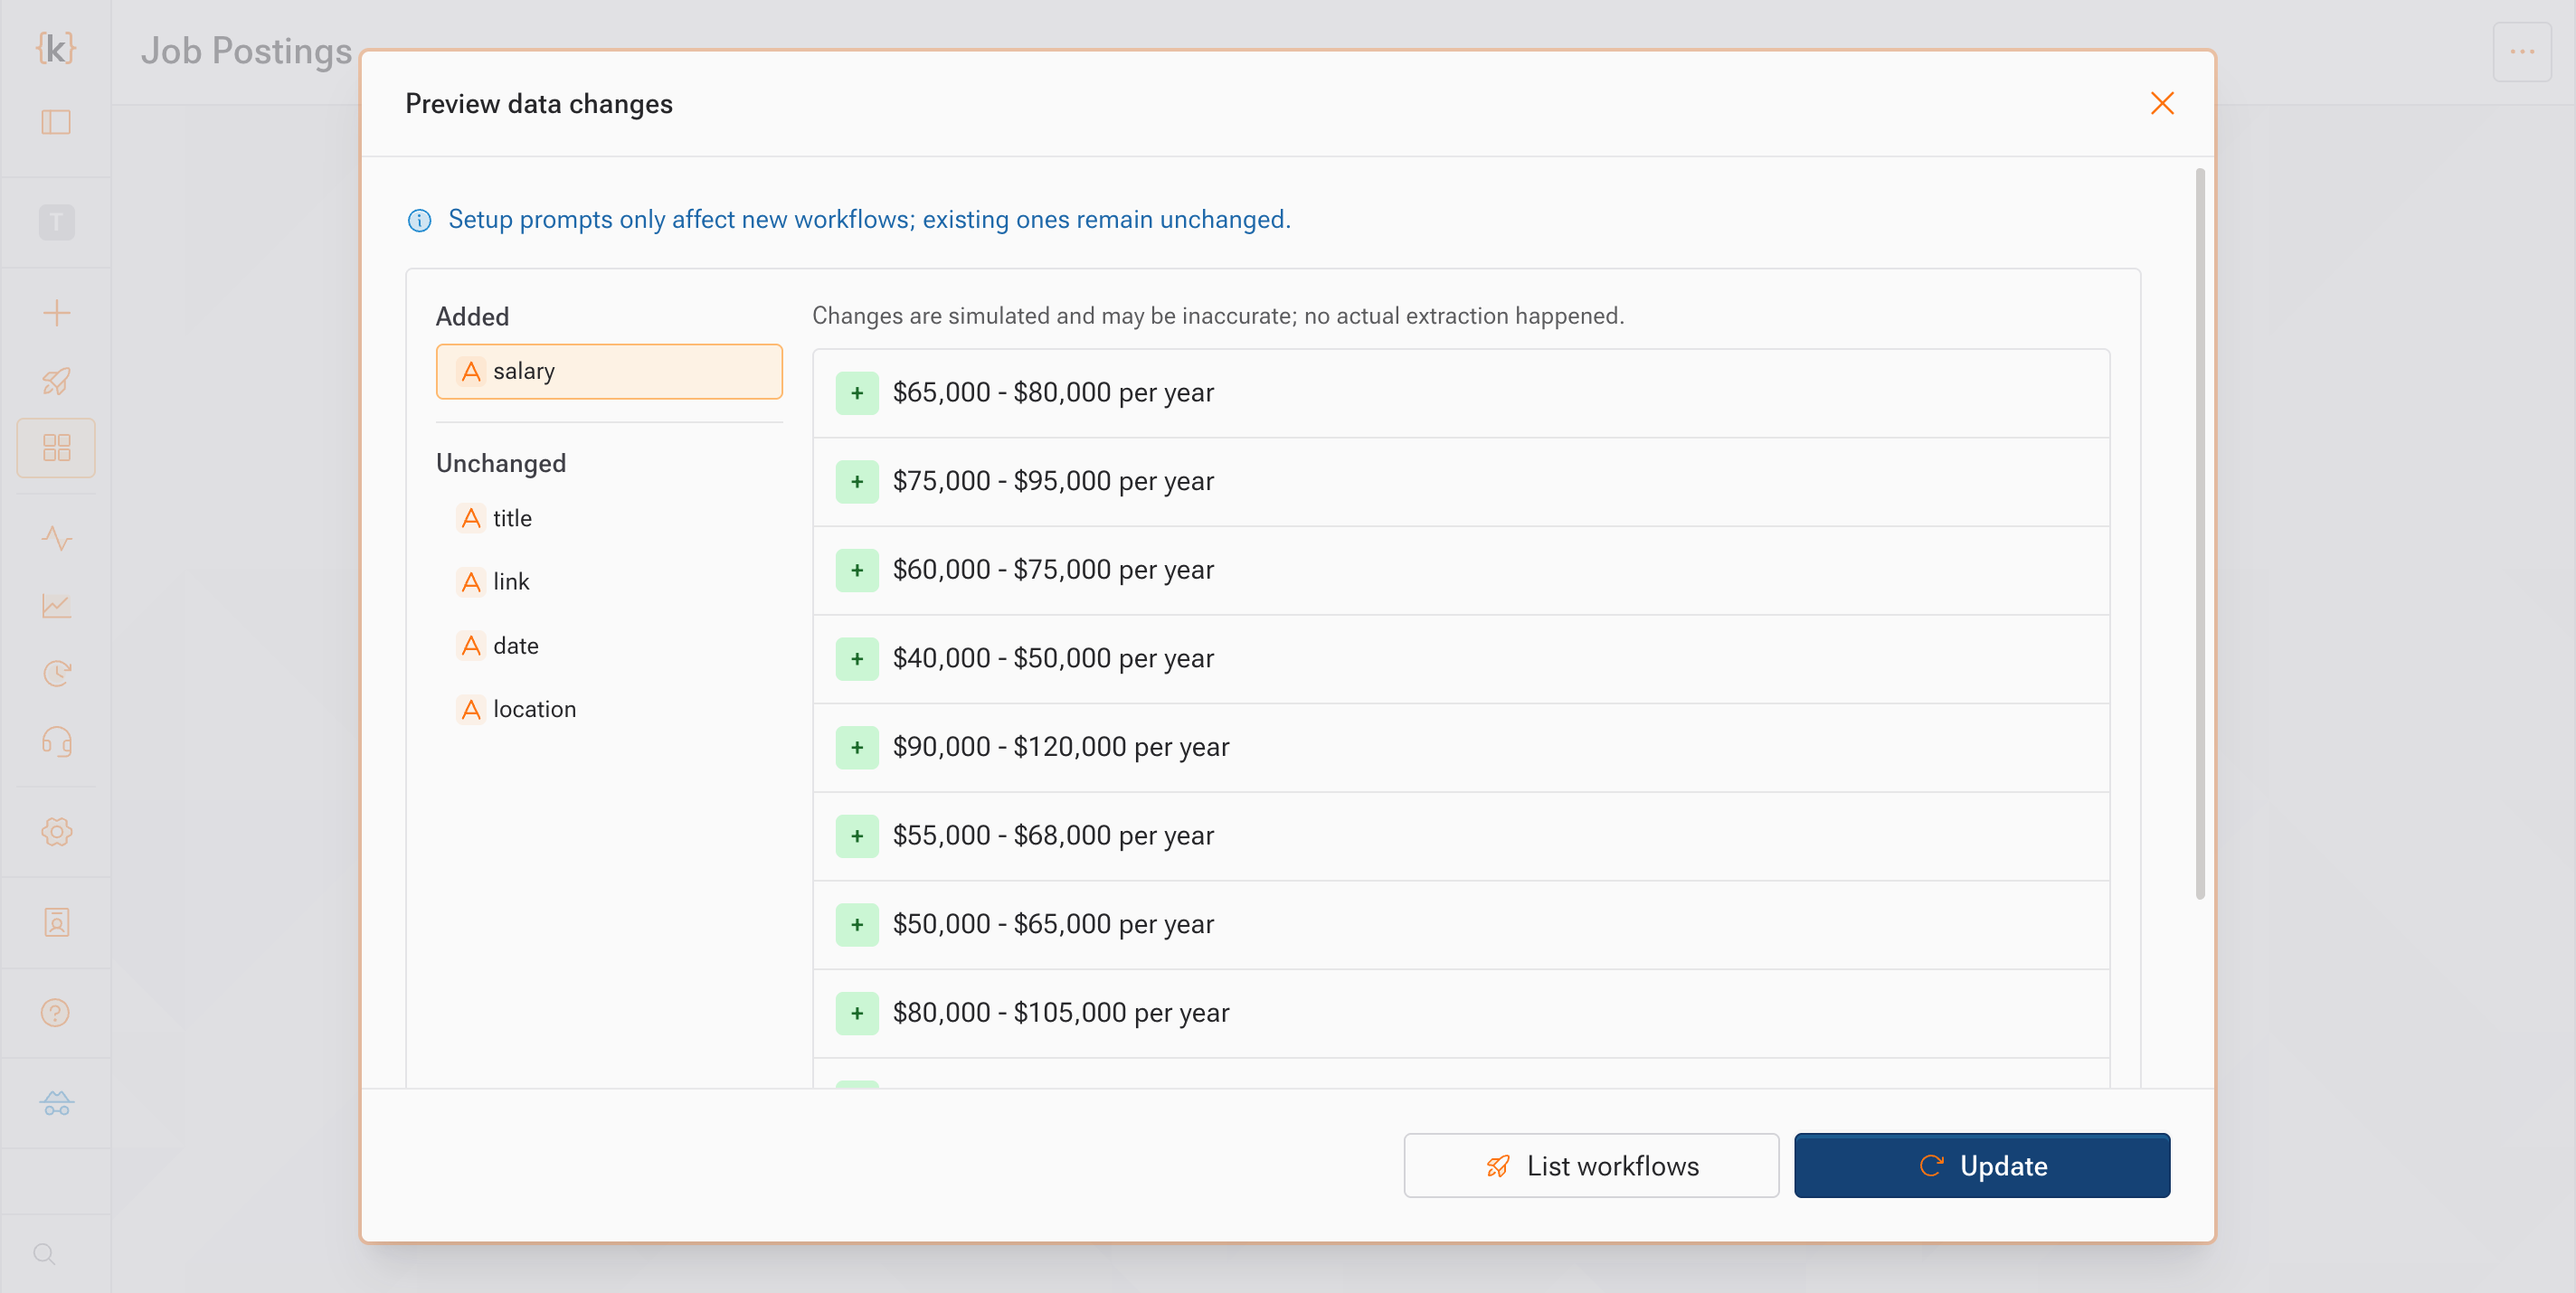
Preview data changes on a linked workflow. The preview groups fields into added, updated, and removed, and shows existing data for unchanged fields alongside a grounded simulation for new ones. Use it to confirm a renamed field will not come back empty.
-
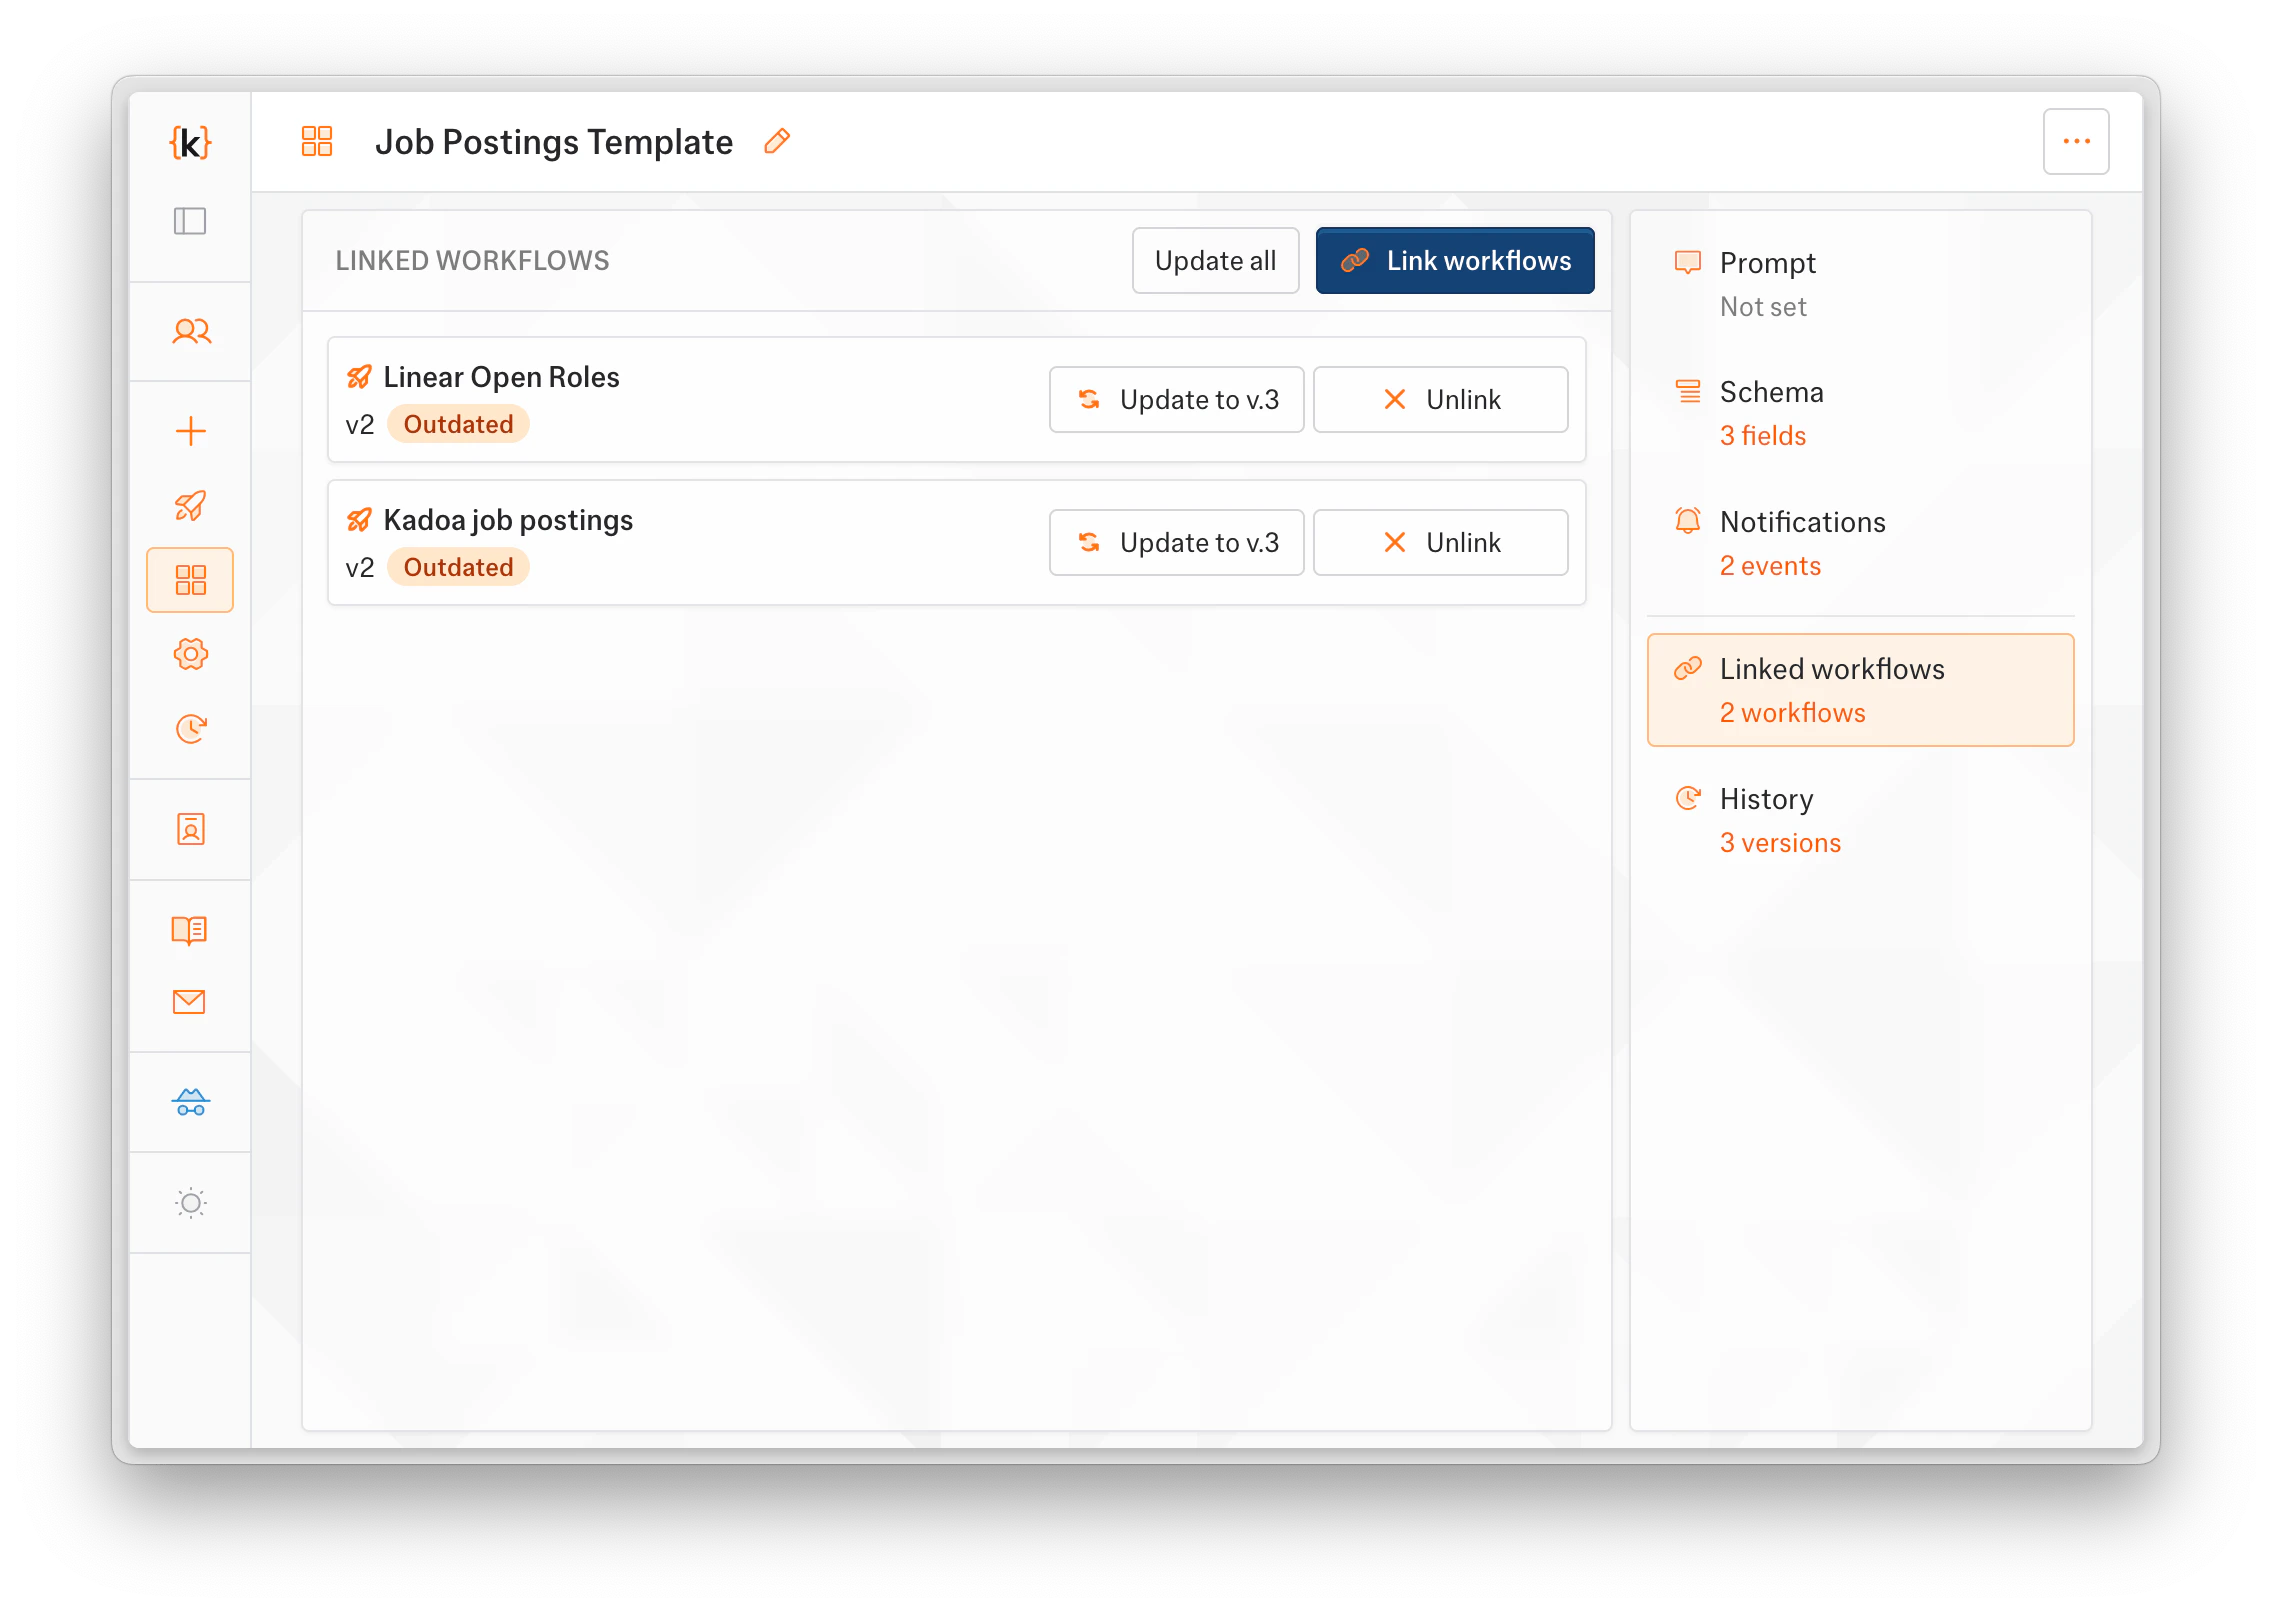
Check the outdated list. The Linked workflows tab marks every workflow behind the latest version. Apply to a few first, review their next run, then use Update all outdated workflows.
What a new version changes on existing workflows
Applying a version never changes data already collected. To see new fields populated, wait for the next scheduled run or trigger one.
Active real-time monitors are skipped when you apply a version. Pause them first if they should be included.
Iterate without disturbing the live template
Use Duplicate to copy the latest version into a new template when you want to experiment. The copy starts at version 1 with no linked workflows. Published versions cannot be deleted, so experimenting on a copy keeps the production template’s history clean.When a workflow needs to diverge
Unlink it. The workflow keeps its current prompt, schema, rules, notifications, and frequency, and all of them become editable. Unlinking one workflow does not affect the template or any other linked workflow.Checklist
Before creating workflows from a new template:- The template owns only the parts that should be identical on every source.
- The setup prompt covers what a record is, scope, pagination, detail pages, and empty results. It has no URLs.
- Every field has a short description. Fields with format or sourcing rules have an instruction and an example.
OBJECTandARRAYfields have a JSON example in the expected shape.- Fields with a 100 percent presence rule are published by every source you plan to connect.
- A stable key field is set, or a Unique ID function field is the key.
- Changing lists live in variables, not in the prompt.
- You have compared it with the previous version.
- You have previewed data changes on at least one linked workflow.
- Real-time monitors that should be included are paused.
- You have applied to a small set first and reviewed a run.